

Camping-toilet
Vanlife
Tips & Tricks
Having your own toilet in the camper is a great thing because it gives you much more flexibility and you can stand on your own for a few days. If you want to do without the usual chemical toilets, a dry toilet is a good choice.
I show you how to build a dry camping toilet for the van like VW bus by yourself.
Building your own camping toilet – The dry toilet without chemicals
For those who are often on the road in their campers, the topic „toilet“ is always one of those things. Some use the integrated classic chemical toilet, others an additional chemical toilet a la Porta-Potti. Others have nothing of the sort on board and are dependent on other ways of doing their business.
Especially when living space is limited, as in our VW Bus, it is not so easy to accommodate a toilet. Since we would like to be as independent as possible, sooner or later we needed at least an emergency toilet.

In the green nature our Günter is hardly noticeable
Personally, I don’t think much of chemical toilets, even though they would certainly be the fastest and easiest solution. But the possible smell of chemicals and also the emptying of the toilet cassette at special disposal stations made this kind of camping toilet rather uninteresting for us.
On the other hand, there are the very minimalistic solutions to do one’s necessities: A bucket or a rack with a garbage bag that you use for business. But both Pragya and I were also less enthusiastic about this more „rustic“ way. So you have to do it yourself to make the dream toilet.
Which camping toilet we decided on and how we built it, you will find out in this article.

The finished camping toilet for our VW Bus
The dry toilet as a camping toilet
After some back and forth we finally decided to build our own dry toilet. There are different variants, as you can read in detail at Camperstyle.
For the sake of simplicity, we decided against a separating toilet, where liquid and solids are separated. Meanwhile, I know that you can build the separation sets yourself, but in the first step, everybody starts small.
So that means that in our mobile camping toilet we collect the whole business in a container and then dispose of it. The advantage of this is that we can completely do without additional chemicals.
In addition, we are much more flexible with the dry toilet in the VW bus. Similar to the way dog owners walk their dogs, we can first cover our leftovers with rabbit litter and then dispose of them in the residual waste container. So we are not dependent on the disposal stations.

The box also serves as a stool and footrest
Basically, all we need is a bucket, compostable garbage bags, paper, and small animal litter to successfully complete our business. The small animal litter binds the remains and thus prevents it from stinking. Water is logically not used in the dry toilet.
Since our delicate buttocks naturally prefer some comfort, we still pack this dry toilet in a nice container. Many thanks therefore to my father for the great help.
Building the camping toilet yourself
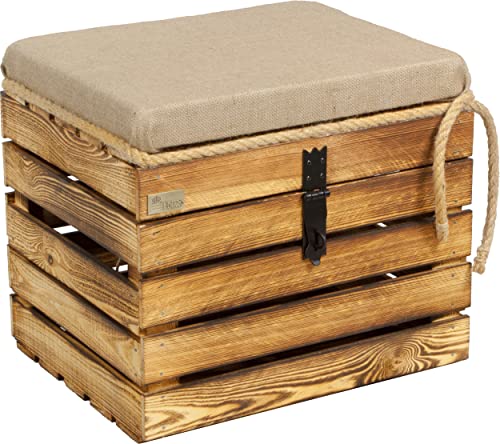
First of all, you need a nice container for the nice camping toilet. We have decided on a wooden box with lid in the dimensions 50x40x44cm. It has a seat cushion and fits perfectly behind the passenger seat of the VW bus. In addition, you can use the box as a stool or as a footrest when closed.

The wooden box for the camping toilet
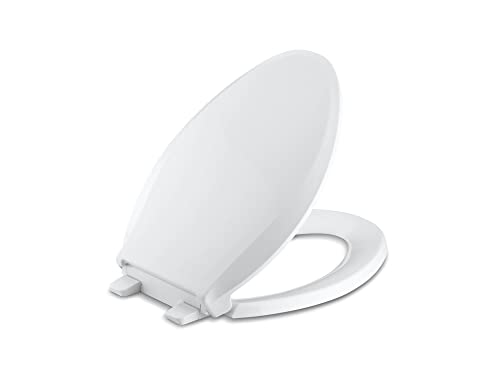
In addition, there is a toilet seat in the dimensions 45x37cm*, which we found by chance at OBI and some wood as building material.
Among them are a few thin chipboards as inner lining and a pressed wood plate with 16mm thickness on which the toilet seat is mounted. Last but not least you will need a suitable bucket, which you can use as a collection container. We used my old diaper bucket, which my mother found at home. It’s nice to see that after more than 30 years the part is used as intended again.

The diaper pail finds a new purpose in the camping toilet
In the first step you have to determine the dimensions of your crate to cut the pressed wood panel to size. We have adjusted it with the help of screwed wooden strips so that the plate is flush with the edge of the box. Adjusting the wooden plate can be a bit tricky, because the measurements of our wooden crate were a bit „skewed“ and we had to sand some corners again. For this reason we can’t give you any standard measurements at this point.

Careful measurement is important
Taking the right measurements of the camping toilet
As soon as you have cut and adjusted the pressed wood plate, you can start working on the hole of the toilet. We have cut the hole so that it is a bit bigger than the bucket, so that we can also remove the lid of the bucket in between or put it on top. Also, make sure that the hole fits the toilet seat. You can move the bucket in the box easier than the screwed toilet seat.

Align the toilet seat on the pressed wood plate

Saw out the hole for the toilet seat
In the next step, we started with the interior lining of the box. My wooden crate is a rather typical wine crate and therefore visible below. Therefore we cut chipboards to size, which we can screw to the inside of the crate to create a certain odor and privacy protection.

The inner lining of the dry toilet ensures dryness
Assemble the dry toilet.
I painted all the adapted wooden parts with wood stain and let them dry before we screwed them on the inside of the boxes and sealed the open joints with silicone.
After the paint and silicone had dried, the next step was to screw the toilet seat onto the pressed wood plate. Here you have to work a little bit with the play of the screw connection so that it fits perfectly on the hole and into the crate.
We screwed the additional wooden strips to the 4 inner angles of the wooden crate as a support for the pressed wooden plate, so that the pressed wooden plate including the toilet seat lies well on the crate and ends with the edge of the wooden crate.

Silicone in the joints ensures tightness

All joints are sealed with silicone
In the next step, we had to fix the bucket under the toilet seat. To do this, we first screwed the painted inner lining to the box and took measurements with the bucket on the floor.
With the help of wooden strips, which we cut into light radii, we can now fix the bucket.
In the end, all that remains is the final adjustment and fixing of all components, and the ecological camping toilet for our VW bus is finished. In the bucket fit now biologically degradable 20-liter garbage bags and around the bucket around it, we can store in the box still the toilet paper as well as the rabbit litter.

The camping toilet for the VW bus is ready

The camping toilet offers still place for paper and litter
The mobile camping toilet in action
We are more than satisfied with our camping dry toilet in the VW bus. It looks good, does not take up too much space, and even has some storage space for toilet paper, small animal litter and Co. It is perfectly stored behind the passenger seat and can of course be easily transported from A to B if desired. All in all, I expected more quality from the box itself, but for our purposes, it was still perfect.

Decorative dry camping toilet in VW T3
We will test our dry toilet in the next few weeks and see how the smell is developing. Therefore, we will first use a mixture of small animal litter and an absorber granulate* for binding, which should hardly cause any odors. Bark mulch would also be an alternative, I like the smell anyway. This way we don’t have to dispose of the compost bag directly, but can also stand self-sufficiently for a little longer. Later on, we will upgrade to a dry separation toilet, depending on the result.
Keine Produkte gefunden.
Which toilets do you use when camping? Where do you see the advantages and disadvantages? You can tell us in the comments.
More information about camping and the bus can be found here:
Would you like to remember this article for reading at Pinterest?
Then just click on the picture.

Hey, we are Pragya and Henrik, the creative minds behind Fernweh Koch. As passionate travelers with a big appetite, we discover the world, always looking for great destinations and delicious food. If you want more information and impressions, please follow us on Facebook, Pinterest and Instagram. Just click on the respective picture below. You can also find Fernweh-Koch at Bloglovin and Flipboard.


+++ Advertising | Affiliate – This article contains affiliate links marked with a *. If you order something over it, you will still pay the normal price. However, I get a small commission from the provider, so I can continue to buy delicious ingredients for my recipes in the future +++